


TABLE OF CONTENT
- Understanding the Basics of Neon Sign Installation
- Choosing the Perfect Spot for Your Neon Sign
- Tools and Materials You’ll Need
- Step-by-Step Guide to Hanging Your Neon Sign
- Alternative Hanging Methods Without Drilling
- Maintenance and Care for Longevity
- Troubleshooting Common Neon Sign Issues
- Conclusion: Enhancing Your Bar’s Ambiance with Neon Signs
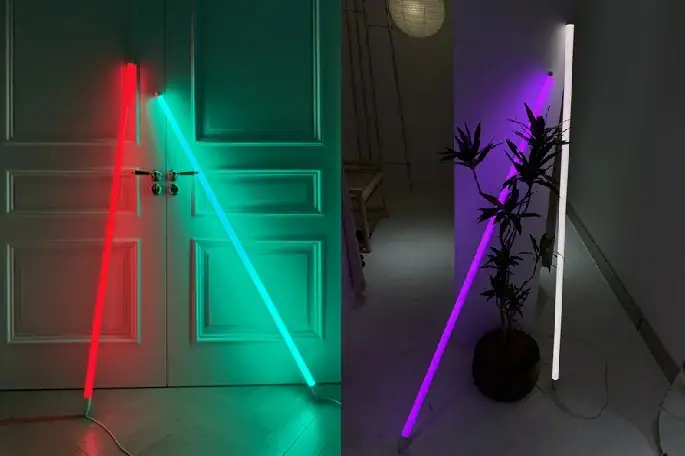
Neon signs are a popular choice for bar decor. They add a unique ambiance and a retro vibe.
But hanging these signs can be a challenge. It’s not just about aesthetics, but also safety and durability.
This guide will help you navigate this process. We’ll cover everything from choosing the perfect spot to the actual hanging process.
You’ll also learn about the tools you’ll need and how to maintain your neon sign. We’ll even touch on troubleshooting common issues.
So whether you’re a bar owner, a manager, or a DIY enthusiast, this guide is for you.
Understanding the Basics of Neon Sign Installation
Installing a glass neon sign involves more than just hanging it on a wall. It requires attention to detail and the right approach.
First, you need to understand the basics of neon lighting. These signs are made of glass tubes filled with gas. If you are interested in more detailed information, please check our glass neon sign page.
Handling them with care is crucial, as they can be fragile. Knowing the components and how they work can prevent accidents.
Before installation, familiarize yourself with your sign’s specifics. This includes its weight, electrical needs, and manufacturer’s instructions.
Choosing the Perfect Spot for Your Neon Sign
Selecting the ideal location for your glass neon sign is a key step. Visibility is a top priority.
A well-placed sign grabs attention and enhances the bar’s ambiance. Make sure the sign is easy to spot from various angles.
Consider areas with high foot traffic in your bar. These spots are usually prime locations for such signs.
Also, factor in the overall aesthetic of your space. A neon sign should complement and enhance the existing decor.

Assessing Wall Material and Sign Weight
Wall material impacts how you hang your sign. Different materials require different approaches.
For example, brick walls need more robust solutions than drywall. Always check the wall’s ability to support your sign’s weight.
Thinking about the weight and wall material saves time and avoids potential damage.
Visibility and Aesthetic Considerations
A neon sign should enhance, not disrupt, your bar’s look. Consider the theme and feel of your establishment.
Ensure that the lighting doesn’t clash with other decorations. Neon signs should add charm without overwhelming the decor.
Lastly, consider how your customers will view the sign. Position it for the best possible angles and visibility in the room.
Tools and Materials You’ll Need
Before you begin hanging your neon sign, gather all the necessary tools. Having everything ready simplifies the installation process.
Here’s a list of essential tools and materials:
- Drill and drill bits
- Screws and wall anchors
- Level and measuring tape
- Pencil or marker for marking
- Ladder or step stool
These tools help ensure a secure and straight installation. Proper preparation is key.
Invest in quality tools for better results and easier installation. Don’t compromise on essentials.
Ensure you have the right size screws and anchors to match the wall type. It guarantees sturdiness and safety for your neon sign.
Step-by-Step Guide to Hanging Your Neon Sign
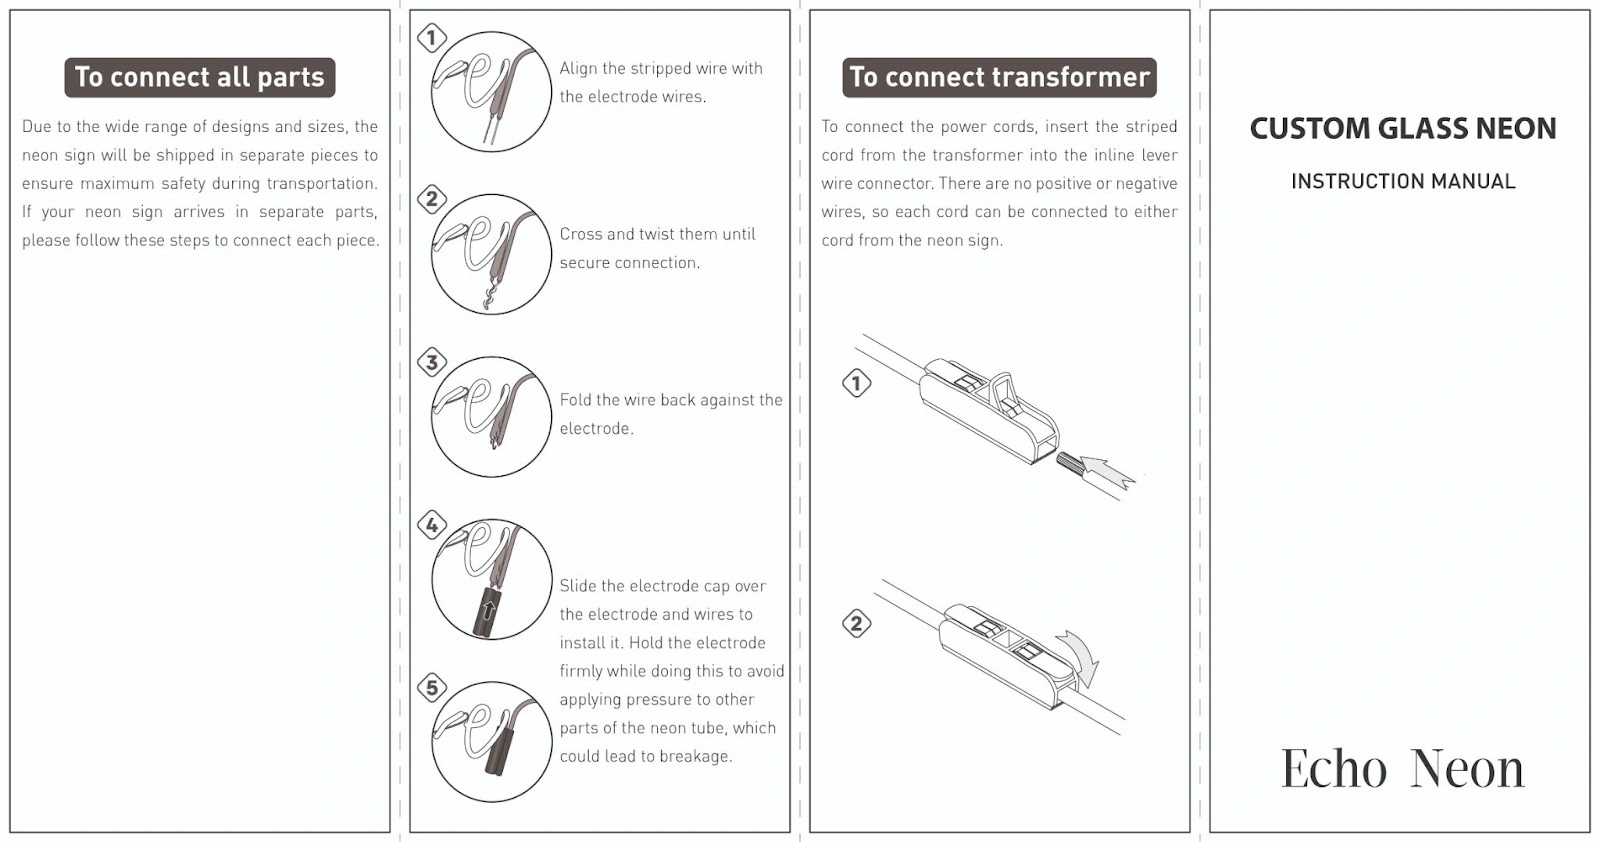
Hanging a neon sign can seem daunting, but it is manageable with the right steps. Start by reviewing the manufacturer’s instructions that come with your neon sign. These provide specific guidelines tailored to your sign’s design.
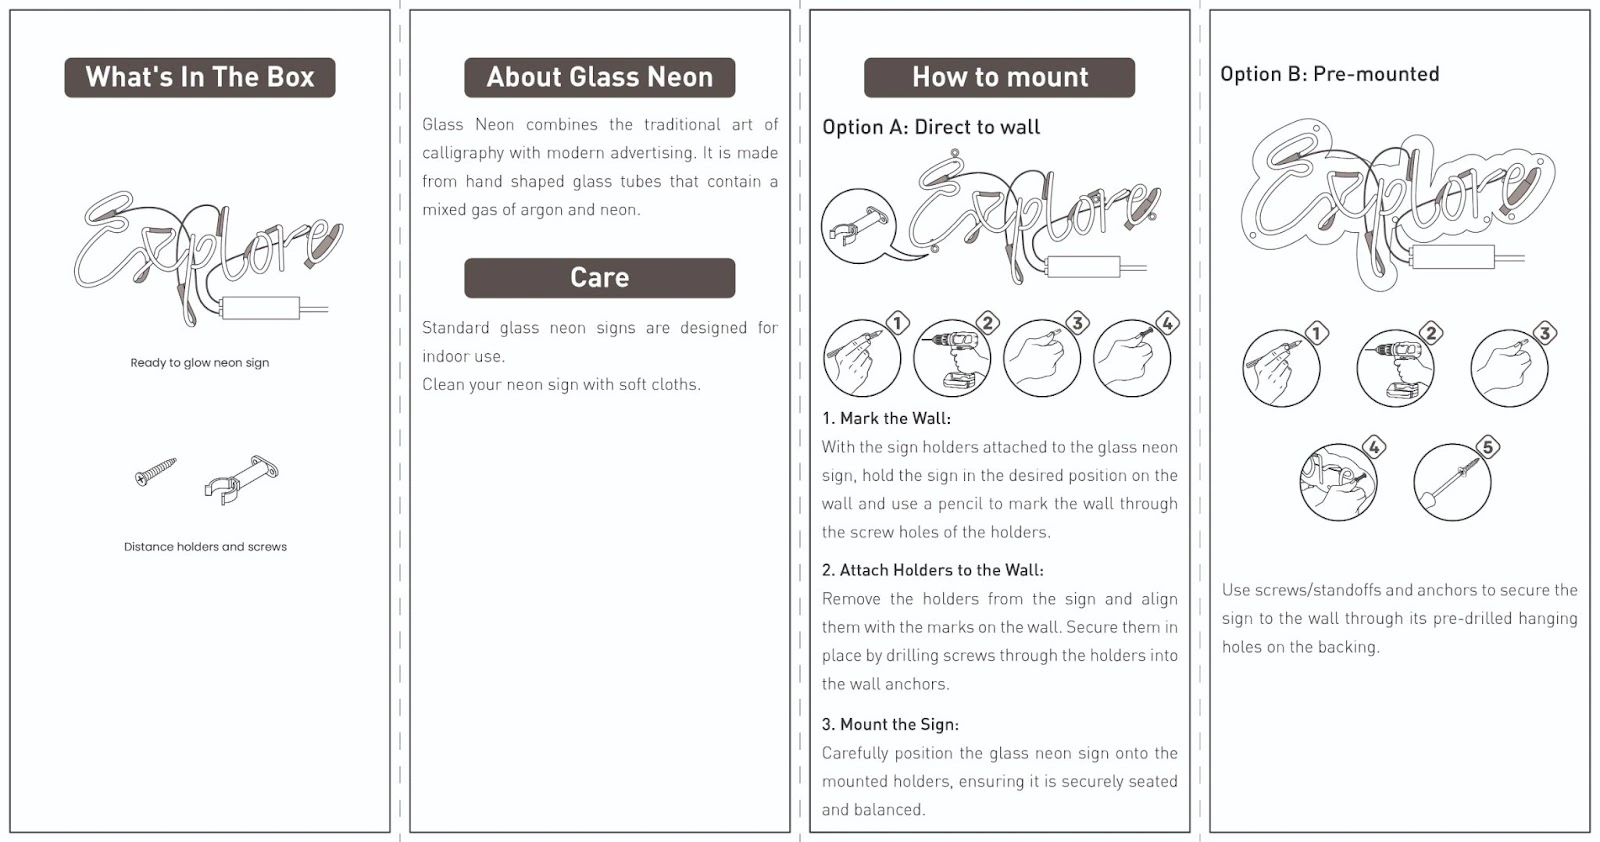
First, decide on the perfect spot for your sign. Ensure your selected location is visible and complements the room’s decor. The next step is to check the wall type and note if it’s drywall, brick, or wood.
With your spot decided, gather your tools and materials. A checklist ensures you have everything you need. Begin by laying out all the parts included with your neon sign.
Consider enlisting help if your sign is large or heavy. A second pair of hands can make the process safer and easier. Once you are set, mark the drill points on the wall.
Proceed to insert wall anchors, using a drill with the correct drill bit size. Ensure the anchors are flush with the wall. This provides a secure foundation for the sign.
After installing the wall anchors, attach mounting brackets or screws. Double-check for stability. Test alignment with a level to keep your sign straight.
Next, it’s time to handle the electrical setup. Safety should be your priority, so make sure the power is off before proceeding. Follow the instructions for hooking up power if needed.
Finally, admire your handiwork. Adjust and hide any cords for a clean, sleek look. Your neon sign is now ready to illuminate the space beautifully.
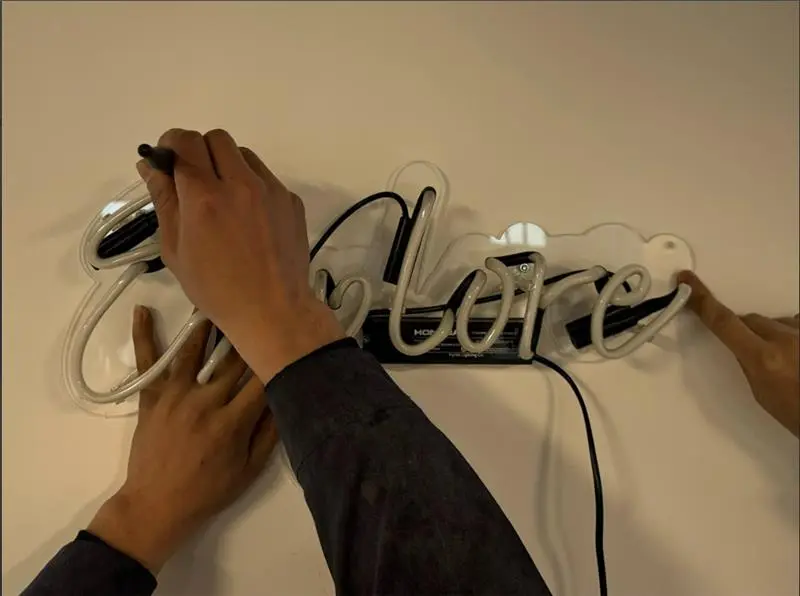
Preparing the Wall and Marking Drill Points
Begin by cleaning the wall where the sign will hang. A clean surface ensures better adhesion and prevents dust interference. Next, use a level to draw a straight line across the wall.
Mark drill points along the line using a pencil or marker. Measure the distance between mounting hardware pieces on your neon sign. This helps determine the spacing needed for wall anchors.
Double-check your measurements. Accuracy is vital to prevent mismatched or uneven drill holes. Ensuring precision at this stage saves time and enhances the final look.
Lastly, inspect the wall structure. Identify any studs or hollow sections. This can affect how securely the neon sign is mounted.
Securing the Sign with Mounting Hardware
Mounting hardware is key to a secure installation. Choose appropriate hardware based on your wall type. For drywall, use anchors; for brick, use concrete screws.
Start by drilling into the marked points on the wall. Drilling creates a space for your anchors or screws. Insert wall anchors, ensuring they are level with the wall.
Position the neon sign on the wall. Align the mounting hardware with the pre-drilled holes. Secure it by tightening screws into the anchors.
Confirm that the sign is stable and doesn’t shift. Ensure it’s straight using a level before making any final adjustments. Stability means longevity for your neon sign.
Electrical Setup and Safety
Electrical setup is crucial for proper operation. Before working on the wiring, turn off the power source. Safety comes first to prevent accidents or shocks.
Connect the neon sign to its power supply. Follow the manufacturer’s guidelines to ensure correct wiring. Secure any exposed wires to avoid hazards.
Finally, consider using wire covers or channels. These help manage cables and maintain a tidy appearance. Your neon sign should now light up perfectly and safely.
Alternative Hanging Methods Without Drilling
Not all walls are suitable for drilling. Sometimes, drilling isn’t preferred due to structural concerns or aesthetic reasons. Fortunately, there are alternative methods to hang your neon sign without using a drill.
These methods are often simpler and less invasive. They’re perfect for renters or in temporary settings. Here are some non-drilling options to consider:
- Adhesive hooks
- Adhesive strips
- Suction cups
- Hanging chains
Each option has its benefits depending on your specific needs. Choose based on your wall type and sign weight.
Using Adhesive Hooks and Strips
Adhesive hooks and strips are ideal for lightweight signs. They work on smooth surfaces, providing a damage-free installation. Ensure the wall is clean before applying the adhesive.
Position the hooks according to the sign’s mounting points. Press them firmly onto the wall, allowing time for the adhesive to set. Once secured, hang your neon sign with ease.
Employing Suction Cups and Chains
Suction cups are another great option, especially for glass or tile surfaces. They support lightweight neon signs effectively. Simply attach the suction cups and hook them onto the sign’s mounting points.
Chains offer flexibility for hanging at varied heights. They are particularly useful for exposed ceilings or beams. Use hooks to secure the chains and adjust as needed for the perfect display.
Maintenance and Care for Longevity
Regular care can extend the life of your neon sign. Clean the surface gently using a soft, dry cloth. This removes dust and prevents build-up which can dull the glow.
Inspect the electrical components for any signs of wear or damage. Addressing minor issues early prevents major problems later. Ensure that connections remain tight and secure.
Avoid exposure to harsh elements. If your neon sign is outdoors, consider using a weather-resistant cover. Protecting against humidity and direct sunlight maintains both the sign’s color and brightness.
Troubleshooting Common Neon Sign Issues
Sometimes, neon signs might flicker or fail to light up. This could indicate an issue with the power supply. Check the connections and ensure everything is plugged in securely.
Another common problem is dim lighting. This could result from dust accumulation on the tubes. Clean them gently with a microfiber cloth to restore brightness.
If your neon sign still doesn’t work, consider consulting a professional. Repairing neon signs can be complex and is best handled by someone with experience.
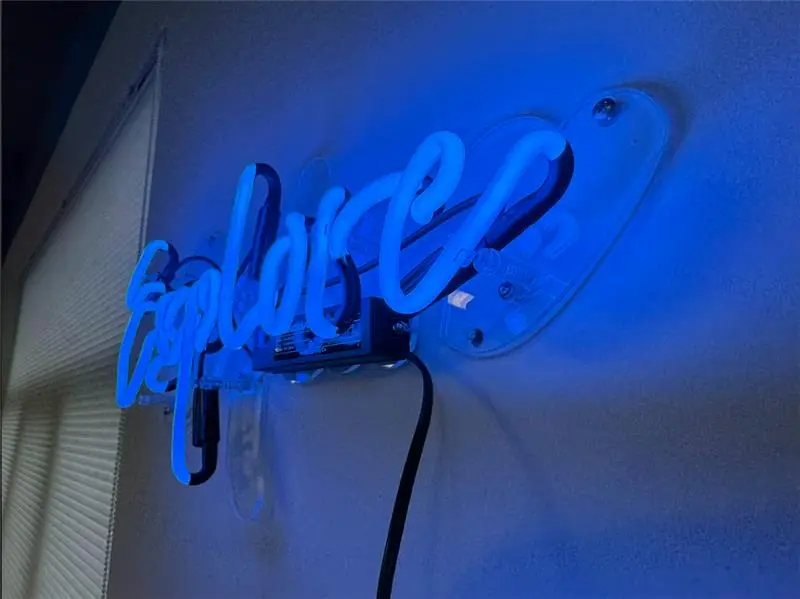
Conclusion: Enhancing Your Bar’s Ambiance with Neon Signs
Neon signs can transform a bar’s atmosphere, making it more inviting and vibrant. They draw attention and create a distinctive vibe that patrons will remember.
With proper installation and maintenance, your neon sign can become a lasting decor element. It effectively highlights key areas and enhances the overall aesthetic of the space.
Choosing the right neon sign and hanging technique can boost your bar’s ambiance. This thoughtful approach ensures both safety and visual appeal for years to come.